Ah the mincemeat bran muffin. It's strange what things stand out from your childhood memories. These muffins were a staple on the breakfast menu of my Aunt and Uncle's bed and breakfast in Victoria, BC. Every summer my family would make the drive from Calgary to the island for a visit with family and a stay at the B&B. This annual trip quickly became and still is my favorite event of the year. Once moved out on my own, I began making the drive alone and did so for several years. Now the boyfriend comes along and perhaps one day some kids will join us, bringing the tradition full circle.
One day I was going through an old box and came across the recipe. I thought it would be wonderful to make these muffins myself, and share the memory with Stephen. I didn't tell him what was in them, just that I was making muffins (his favorite thing). He was excited to try them. I told him there was a secret ingredient.
He hated them, and only because of the mincemeat. He can't look past it. So there the mincemeat jar sits, in the back of the fridge, feeling unwanted *tear*. When Stephen asks for muffins too many times, or when I'm too busy I threaten him by saying I'll make the mincemeat bran ones.
Kidding aside, these muffins really are amazing. They are easy, low maintenance (keep the batter in the fridge until ready to use) and they freeze well.
INGREDIENTS
2 eggs, lightly beaten
1 cup sugar
1/4 cup canola oil
2 cups milk (2% preferably)
2 cups all-purpose flour
1 cup bran
2 teaspoons baking powder
2 teaspoons baking soda
1 teaspoon salt
1 cup mincemeat
DIRECTIONS
1) Beat together the egg, sugar and oil in a bowl. Add the milk and bran and beat together. Add the flour and other dry ingredients followed by the mincemeat. Let stand in the fridge at least overnight.
3) Preheat oven to 375F. Bake for 20 minutes as needed and keep the balance of the batter in the fridge until ready to use.
Wednesday, August 12
Sunday, November 9
Pumpkin "Scone" Muffins
Found in:
Muffins
Right off the bat you're probably saying "what the f*&$ is a scone muffin?" Well you see, I invented it by mistake and now it's going to be the next "cronut".
It started out with Stephen begging for muffins (nothing new), so I started my usual quest of looking at recipes on Pinterest for inspiration. I knew I wanted to make pumpkin muffins, and all of the recipes I came across called for butter. I always put oil in my muffins, and there was a voice inside my head saying "don't use melted butter!!" but I wanted to live dangerously. I opted for the melted butter in spite of the risks.
My main concern was the order in which I would add my wet ingredients. I knew that I could not add the egg to the butter first as it would make scrambled eggs. An intelligent human being would put the sugar in next because that is the standard procedure for most baking recipes. Nope I thought, "I will cool the butter down by adding the milk next. Well cool the butter down I did into nice tapioca sized balls.
I had no idea how they would turn out. The batter was thick, and oddly sticky. Nonetheless I popped them in the oven. I wondered if they would turn out pastry like because of the butter chunks, and man did they ever. The result was flaky, pull-apart scone muffins!
INGREDIENTS
1 cup melted butter (cooled to room temperature)
1 cup granulated sugar
1 cup milk
1 egg
1 cup pumpkin
3 cups flour
4 teaspoons baking powder
1 teaspoon salt
1 teaspoon cinnamon
1 teaspoon nutmeg
DIRECTIONS
1) Preheat oven to 325F. Line two 12-cup muffin pans with liners. There exists a muffin pan with 24-cups. I need this for Christmas.
2) Begin by melting the butter in the microwave on 30 second intervals until completely melted. Allow butter to cool to room temperature. Here you have two options:
- Whisk in the cold milk next for "scone" muffins. I'm literally laughing out loud at how unorthodox this is, and that I'm actually suggesting it.
- Whisk in the sugar next for "normal" muffins.
If you added the milk first, add the sugar next. Then add the egg, and the milk if you haven't already done so.
3) Combine the flour, baking powder, salt, cinnamon and nutmeg in a separate bowl. Add in the wet ingredients and the pumpkin. Stir just until combined. Bake for 30 minutes or until a toothpick inserted into the center of a test muffin comes out clean.
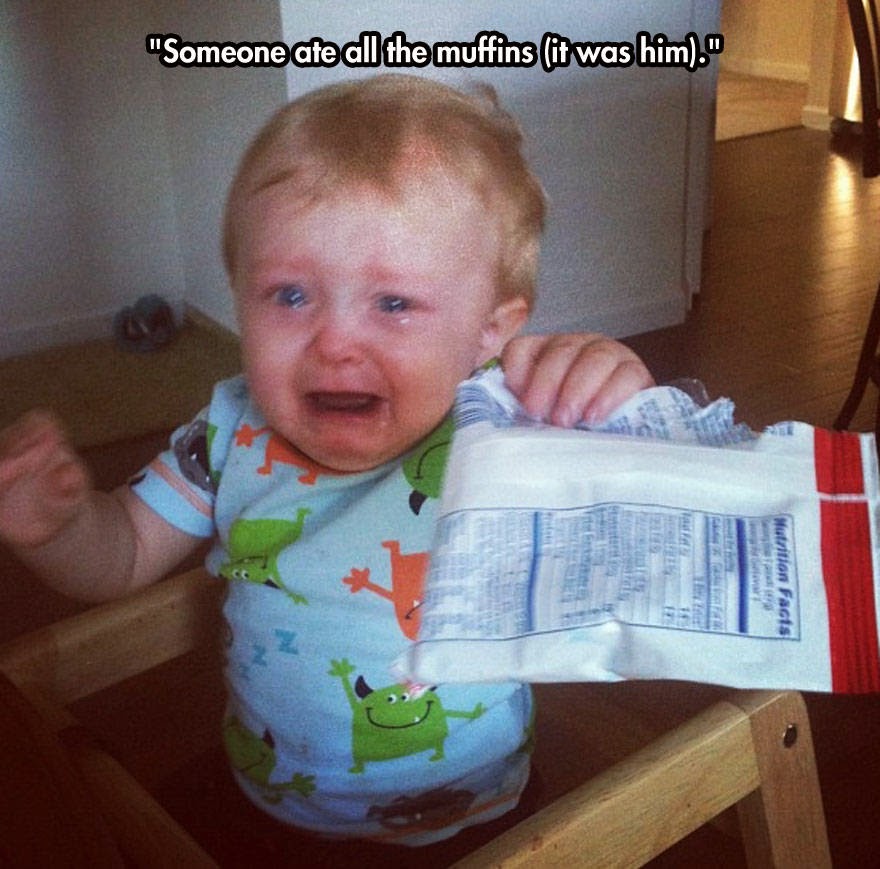 |
| This is what I see when Stephen asks me for muffins |
My main concern was the order in which I would add my wet ingredients. I knew that I could not add the egg to the butter first as it would make scrambled eggs. An intelligent human being would put the sugar in next because that is the standard procedure for most baking recipes. Nope I thought, "I will cool the butter down by adding the milk next. Well cool the butter down I did into nice tapioca sized balls.
I had no idea how they would turn out. The batter was thick, and oddly sticky. Nonetheless I popped them in the oven. I wondered if they would turn out pastry like because of the butter chunks, and man did they ever. The result was flaky, pull-apart scone muffins!
INGREDIENTS
1 cup melted butter (cooled to room temperature)
1 cup granulated sugar
1 cup milk
1 egg
1 cup pumpkin
3 cups flour
4 teaspoons baking powder
1 teaspoon salt
1 teaspoon cinnamon
1 teaspoon nutmeg
DIRECTIONS
1) Preheat oven to 325F. Line two 12-cup muffin pans with liners. There exists a muffin pan with 24-cups. I need this for Christmas.
2) Begin by melting the butter in the microwave on 30 second intervals until completely melted. Allow butter to cool to room temperature. Here you have two options:
- Whisk in the cold milk next for "scone" muffins. I'm literally laughing out loud at how unorthodox this is, and that I'm actually suggesting it.
- Whisk in the sugar next for "normal" muffins.
If you added the milk first, add the sugar next. Then add the egg, and the milk if you haven't already done so.
3) Combine the flour, baking powder, salt, cinnamon and nutmeg in a separate bowl. Add in the wet ingredients and the pumpkin. Stir just until combined. Bake for 30 minutes or until a toothpick inserted into the center of a test muffin comes out clean.
Saturday, August 30
Martian Muffins
Found in:
Muffins
I may or may not have been experimenting in the kitchen again... I have this serious habit of starting to follow a recipe (baking or otherwise), only to yell out "I'm doing my own thing now!", dramatically throwing the recipe across the room. Just kidding I made that up, because to do that would involve throwing the laptop on which the recipe resides. Stephen responds with something along the lines of "ohhhhh dear, here we go". I asked him yesterday if it makes him nervous when I invent meals. He assured me that it doesn't, because everything I come up with is delicious.
I had a giant zucchini to use. I started by making a batch of zucchini chocolate chip muffins. When I went to make a second batch, I remembered the butterscotch chips in the pantry. Without a second thought, I threw those babies in there instead of chocolate. They were delightful!
The inspiration for the name came after I decided to search "zucchini butterscotch chip" on Pinterest, just to see how original (crazy) I am. Turns out, there were no muffin recipes like mine, however there was a zucchini butterscotch chip cookie called a "martian cookie". Well then I guess that makes these "martian muffins".
INGREDIENTS
2 cups grated zucchini
DIRECTIONS
1) Preheat oven to 325F. I've started baking muffins "low and slow", like we're BBQ'ing or something. Prepare your muffin pan by lining with muffins cups.
I had a giant zucchini to use. I started by making a batch of zucchini chocolate chip muffins. When I went to make a second batch, I remembered the butterscotch chips in the pantry. Without a second thought, I threw those babies in there instead of chocolate. They were delightful!
 |
| My lunch, two days in a row. So great. |
The inspiration for the name came after I decided to search "zucchini butterscotch chip" on Pinterest, just to see how original (crazy) I am. Turns out, there were no muffin recipes like mine, however there was a zucchini butterscotch chip cookie called a "martian cookie". Well then I guess that makes these "martian muffins".
 |
| Weird and wonderful, just like me. |
2 cups grated zucchini
1 cup vegetable oil
2 cups sugar
3 teaspoons vanilla extract
3 eggs
3 cups all-purpose flour
1 teaspoon salt
1 teaspoon baking soda
1 teaspoon baking powder
2 teaspoons cinnamon
1 cup butterscotch chips
DIRECTIONS
1) Preheat oven to 325F. I've started baking muffins "low and slow", like we're BBQ'ing or something. Prepare your muffin pan by lining with muffins cups.
2) Start by grating your zucchini because it's good to get the shittiest thing out of the way first. Then beat the oil, sugar, eggs, and vanilla in your mixer. Stir in the zucchini.
3) In a separate bowl, combine the flour, salt, baking soda, baking powder, and cinnamon. Add your wet ingredients to this bowl and stir. Just before the mixture is moistened, stir in your chips until the batter is just combined.
4) Bake for 30 minutes, or until a toothpick inserted in the center comes out clean. Immediately remove from the pan.
Yield: 2 dozen
Thursday, August 28
Oats Part 2: Carrot Oat Muffins
Found in:
Muffins
Holy crap I'm slow with this post! This oat recipe was made on the same day as "Oats Part 1" and here we are, literally one whole month later following up with Part 2. Summer is supposed to be the only time that I get even the smallest bit of down time, but this one has turned out to be as crazy as the rest of the year.
I'm going to get right to the recipe...
INGREDIENTS
2 1/2 cups grated carrots
1/2 cup brown sugar
1/2 cup granulated sugar
1/3 cup canola oil
1 egg
1 cup all-purpose flour
1/2 cup rolled oats
1/2 teaspoon baking soda
1/2 teaspoon salt
1/2 teaspoon cinnamon
1/2 teaspoon nutmeg
1/4 teaspoon baking powder
DIRECTIONS
1) Preheat oven to 350F. Prepare muffin pan by lining with muffin cups.
I'm going to get right to the recipe...
 |
| Stephen's breakfast (second helping of another two muffins?!) |
2 1/2 cups grated carrots
1/2 cup brown sugar
1/2 cup granulated sugar
1/3 cup canola oil
1 egg
1 cup all-purpose flour
1/2 cup rolled oats
1/2 teaspoon baking soda
1/2 teaspoon salt
1/2 teaspoon cinnamon
1/2 teaspoon nutmeg
1/4 teaspoon baking powder
DIRECTIONS
1) Preheat oven to 350F. Prepare muffin pan by lining with muffin cups.
2) Start by grating the carrots. "Grating things is my favorite thing" - said no one ever. Beat oil, sugars, and egg together in your mixer. Stir in your carrots.
3) In a separate bowl, combine the flour, oats, baking soda, salt, cinnamon, nutmeg, and baking powder. Then add your wet ingredients and stir just until moistened. Divide batter evenly in the muffin pan. Bake for approximately 20 minutes, or until a toothpick inserted into the center comes out clean. Immediately remove muffins from the pan.
Slightly adapted from Simple Sundays
Sunday, June 29
Oats Part 1: Oatmeal Chocolate Chip Cookies
Found in:
Cookies
This weekend brought another strange craving similar to the one I had when I desperately wanted pound cake, which resulted in the sinful lemon pound cake. Said craving was for any baking containing oats, so I went all out and came up with two different creations. These oatmeal chocolate chip cookies were the first. To be honest, I kind of wanted oatmeal raisin but boyfriend is a weenie and doesn't like raisins. That being said, you could easily substitute the chocolate chips for raisins as I purposely put cinnamon in this recipe to facilitate a proper switch up.
 INGREDIENTS
1 cup butter, softened
1 cup packed brown sugar
1/2 cup white sugar
2 eggs
2 teaspoons vanilla extract
1 1/4 cups all-purpose flour
1/2 teaspoon baking soda
1/2 teaspoon cinnamon
1/2 teaspoon salt
3 cups of oats (I used the large flakes)
1 cup of semi-sweet or milk chocolate chips (I used milk chocolate because that's what the man child ordered)
DIRECTIONS
1) Preheat oven to 325F. In your stand-up mixer, cream the butter and both sugars until smooth. Add in the eggs one at a time, then the vanilla, and mix until well blended.
2) In a separate bowl, combine the flour, baking soda, cinnamon, and salt. Add the dry ingredients to the mixer and mix until combined. Stir in the oats, and the chocolate chips by hand.
3) Drop onto baking sheets using a teaspoon, or I prefer to use an ice cream scoop. Bake for 12 minutes or until just golden brown on the edges for chewy cookies. Let cool on the baking sheet for approximately 10 minutes before transferring them to a wire rack.
Sunday, May 18
"Pie" Cupcakes
Found in:
Cupcakes
My bff who lives six hours away had her baby girl, Leighton Rayne back in February, but because of my retarded schedule I had yet to meet her. I've felt like a horrible auntie for the past three months! But thank goodness they needed to come to Calgary this weekend for some doctor appointments, ending the madness that was my absence in this baby's life. Baby Leighton also just so happened to turn three months old on the day of our get together!
I know Ashley's favorite dessert is pie, however I don't really "do" pie (yet, maybe one day I will feel so inclined). I got this idea from a picture on pinterest, in which someone topped a cupcake with pie filling, and iced it to look like a pie crust. There was no recipe to accompany it, so I've stolen the inspiration, but come up with the recipe myself.
1 2/3 cup all-purpose flour
4) For the frosting, begin by beating the butter in your stand-up mixer until smooth. Add the vanilla, and milk, then the confectioners' sugar one cup at a time until light and fluffy.
5) To decorate, I began by applying a layer of frosting to each cupcake as a means to level out the tops, and minimize the chance of the pie filling dripping down the sides.

I then added a spoonful of pie filling to the top of each cupcake.

Next, I piped a "wall" around the circumference of each cupcake to hold in the filling. I smoothed the edge of this "wall" into the original layer on the bottom. Then, I piped two horizontal lines, and two vertical lines across the top, over the pie filling. Lastly, I piped around the outside to connect the lines. Voila!
To this day, I've always had a special dislike for vanilla cupcakes. That being said, my goal with this recipe was to also create a vanilla cupcake worth eating. Nailed it! Nailed it to the point where my boyfriend had two for breakfast this morning #lovefat.
 |
| Baby Leighton and Auntie Stef (Uncle Stephen in the mirror) |
INGREDIENTS
 |
| Strawberry Rhubarb "Pie" Cupcake! |
Vanilla Bean Cupcake
1/2 teaspoon baking powder
1/4 teaspoon baking soda
1/4 teaspoon salt
1 cup granulated sugar
1/2 cup butter, melted
1 egg
1/4 cup sour cream
3/4 cup whole milk
1 teaspoon vanilla extract
1 vanilla bean
"Pie" Topping
1/2 can pie filling
1 batch vanilla frosting:
- 1 cup butter
- 4 cups confectioners' sugar
- 2 tablespoons whole milk
- 1 teaspoon vanilla extract
- 1 cup butter
- 4 cups confectioners' sugar
- 2 tablespoons whole milk
- 1 teaspoon vanilla extract
DIRECTIONS
1) Preheat oven to 350F. Line muffin tin with cupcake liners.
2) In a medium bowl, mix together the flour, baking powder, baking soda, and salt. After melting the butter in the microwave in a microwave safe bowl, whisk in the sugar, then the egg (lightly beaten), sour cream, milk, and vanilla extract. Split the vanilla bean down the center, scrape the seeds, and add to the batter.
3) Add the dry ingredients to the wet and stir until combined, and no lumps remain. Divide the batter evenly among the cupcake liners. Bake for approximately 20 minutes or until a toothpick inserted in the center comes out clean. Remove the cupcakes from the pan and allow to cool completely.
 |
| I wish you could see the black flecks of vanilla bean seed! |
4) For the frosting, begin by beating the butter in your stand-up mixer until smooth. Add the vanilla, and milk, then the confectioners' sugar one cup at a time until light and fluffy.
5) To decorate, I began by applying a layer of frosting to each cupcake as a means to level out the tops, and minimize the chance of the pie filling dripping down the sides.
I then added a spoonful of pie filling to the top of each cupcake.
Next, I piped a "wall" around the circumference of each cupcake to hold in the filling. I smoothed the edge of this "wall" into the original layer on the bottom. Then, I piped two horizontal lines, and two vertical lines across the top, over the pie filling. Lastly, I piped around the outside to connect the lines. Voila!
 |
| Boyfriend's breakfast this morning |
Friday, May 9
Carrot Cake
Found in:
Cakes
This carrot cake is a go-to for me around Easter time, but this time I remembered to take some pictures. That means that I could finally upload it onto the blog. The recipe has been slightly adapted from my BBFF Jinelle's co-worker's recipe which is quite famous around their office. It's really basic, which is right up my alley obviously. Therefore no nuts, raisins, etc., I mean come on now.
 INGREDIENTS
Cake:
1 1/2 cups sugar
1 1/2 cups vegetable oil
5 eggs
2 cups all-purpose flour
2 teaspoons baking soda
2 teaspoons baking powder
2 teaspoons cinnamon
1/2 teaspoon salt
3 cups grated carrots
Cream Cheese Frosting:
1 package cream cheese
1 cup butter
2 teaspoons vanilla
5 cups confectioner's sugar
DIRECTIONS
1) Preheat oven to 300F. Grease and flour two 9-inch round cake pans (or line muffin pan if making 12 cupcakes). In stand-up mixer, combine the sugar, oil and eggs. Grate your carrots, or get a man slave to grate them for you.
2) In a separate bowl combine the flour, baking soda, baking powder, cinnamon, and salt. Add to wet ingredients in your mixer, and beat until combined. Stir in the grated carrots.
3) Pour evenly into prepared cake pans. Bake for approximately 50 minutes. Let cool completely before removing from pan and transferring to wire racks. I never do this, so one of my cakes always breaks into several pieces. No one ever knows though because I just put it all back together and then frost it. I like this element of people thinking I'm all profesh, when really I crap the bed at baking like all of the time.
4) For the frosting, beat the cream cheese and butter together in your mixer. Once fluffy, add the vanilla, and then the confectioner's sugar one cup at a time. Frost your cake (or cupcakes) as desired.
 |
| Yup, there are some crumbs in my frosting. Get over it. |
INGREDIENTSCake:
1 1/2 cups sugar
1 1/2 cups vegetable oil
5 eggs
2 cups all-purpose flour
2 teaspoons baking soda
2 teaspoons baking powder
2 teaspoons cinnamon
1/2 teaspoon salt
3 cups grated carrots
Cream Cheese Frosting:
1 package cream cheese
1 cup butter
2 teaspoons vanilla
5 cups confectioner's sugar
DIRECTIONS
1) Preheat oven to 300F. Grease and flour two 9-inch round cake pans (or line muffin pan if making 12 cupcakes). In stand-up mixer, combine the sugar, oil and eggs. Grate your carrots, or get a man slave to grate them for you.
2) In a separate bowl combine the flour, baking soda, baking powder, cinnamon, and salt. Add to wet ingredients in your mixer, and beat until combined. Stir in the grated carrots.
3) Pour evenly into prepared cake pans. Bake for approximately 50 minutes. Let cool completely before removing from pan and transferring to wire racks. I never do this, so one of my cakes always breaks into several pieces. No one ever knows though because I just put it all back together and then frost it. I like this element of people thinking I'm all profesh, when really I crap the bed at baking like all of the time.
4) For the frosting, beat the cream cheese and butter together in your mixer. Once fluffy, add the vanilla, and then the confectioner's sugar one cup at a time. Frost your cake (or cupcakes) as desired.
Subscribe to:
Comments (Atom)
LinkWithin
